Network
Add IP static routes
This page applies to:
- HAProxy ALOHA - all versions
You can add manually configured routing entries to your appliance.
To add a static route by using the web UI:
-
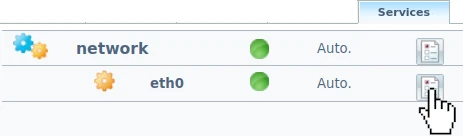
In the Services tab, click network instance setup next to a network interface.
-
Add a static route through the following syntax:
ip route <ip/mask> <gateway>ip route <ip/mask> <gateway>Example:
service network eth0
  ip address 192.168.1.11/24
  ip route 10.0.0.0/24 192.168.1.1
service network eth0 ip address 192.168.1.11/24 ip route 10.0.0.0/24 192.168.1.1 -
Click OK and Close to return to the Services tab.
-
Reload the network interface.
In versions newer than 16.0, click the Apply new configuration button on the interface to apply the changes and automatically restart the network interface service.
-
To make your changes persistent after a reboot, click the Setup tab. Then click Save under Configuration.
This method applies to HAProxy ALOHA 16.5 and newer
To add a static route by using the Network Management CLI:
-
If you haven’t already done so, install the Network Management CLI.
-
Go to the Tools tab and click Launch terminal.
-
Use the
netctl connection showcommand to show existing connection profiles. From the output, get theIDto use in subsequent commands.nixsudo netctl connection shownixsudo netctl connection showoutputtextID UUID TYPE DEVICEethernet-eth0 b6a82f6f-3fdd-467f-b2a1-9e343ba66288 ethernet eth0ethernet-eth1 8805fda9-b1a7-4d5c-bd83-615ceb9e9fdd ethernet eth1outputtextID UUID TYPE DEVICEethernet-eth0 b6a82f6f-3fdd-467f-b2a1-9e343ba66288 ethernet eth0ethernet-eth1 8805fda9-b1a7-4d5c-bd83-615ceb9e9fdd ethernet eth1 -
Using the connection profile’s
ID, callnetctl connection modifyto modify your existing network interface to add the static route.- Set
ipv4.methodtomanual, which lets you set IPv4 settings yourself instead of using DHCP. - Set
ipv4.addressesto your static IP address. - Set
ipv4.routesto"<ip/mask> <gateway>".
nixnetctl connection modify ethernet-eth0 \ipv4.method manual \ipv4.addresses 192.168.1.11/24 \ipv4.routes "10.0.0.0/24 192.168.1.1"nixnetctl connection modify ethernet-eth0 \ipv4.method manual \ipv4.addresses 192.168.1.11/24 \ipv4.routes "10.0.0.0/24 192.168.1.1"To specify more than one route, separate them with a comma.
nixnetctl connection modify ethernet-eth0 \ipv4.method manual \ipv4.addresses 192.168.1.11/24 \ipv4.routes "10.0.0.0/24 192.168.1.1,10.1.0.0/24 192.168.1.2"nixnetctl connection modify ethernet-eth0 \ipv4.method manual \ipv4.addresses 192.168.1.11/24 \ipv4.routes "10.0.0.0/24 192.168.1.1,10.1.0.0/24 192.168.1.2" - Set
-
Use
netctl connection upto restart the network service.nixsudo netctl connection up ethernet-eth0nixsudo netctl connection up ethernet-eth0outputtext# Stopping network[eth0] ...==> stop network[eth0] : Done.# Starting network[eth0] ...==> Link configuration changed for interface eth0==> start network[eth0] : Done.==> load ip config network[eth0] : Done.outputtext# Stopping network[eth0] ...==> stop network[eth0] : Done.# Starting network[eth0] ...==> Link configuration changed for interface eth0==> start network[eth0] : Done.==> load ip config network[eth0] : Done. -
Save the configuration to make your changes persistent after a reboot.
nixsudo config savenixsudo config save
To add a static route by using the config command:
-
Connect to the appliance as user
adminwith the passwordadminthrough:- SSH at
http://<IP Address>:4444/, or - the serial port.
In version 13.5 and newer, you can also click Launch a terminal in the web UI’s Tools tab.
- SSH at
-
Become the
rootuser.nixrootnixroot -
Add a static route.
nixconfig set network.<interface> <ip/mask> <gateway>nixconfig set network.<interface> <ip/mask> <gateway>Example:
nixconfig set network.eth0 ip-route 10.0.0.0/24 192.168.1.1nixconfig set network.eth0 ip-route 10.0.0.0/24 192.168.1.1 -
Restart the
networkservice.nixservice network restartnixservice network restart -
Save the configuration to make your changes persistent after a reboot.
nixconfig savenixconfig save