Network
VLAN
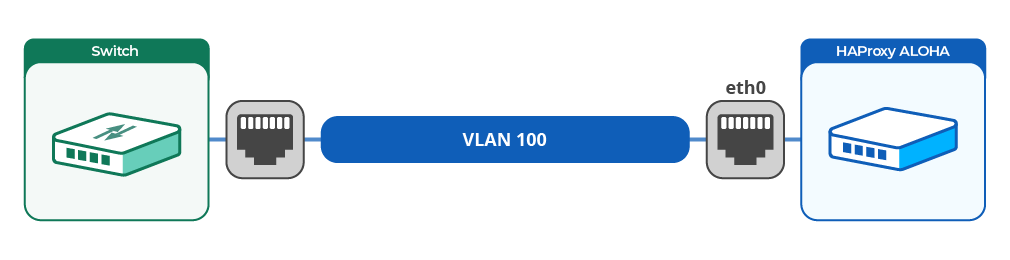
An HAProxy ALOHA network interface may be connected to a switch interface through a VLAN trunk link. You can then create a VLAN interface on the HAProxy ALOHA instance to route traffic over the relevant VLAN.
This feature is based on the VLAN tagging capability.
Create a VLAN interface Jump to heading
To create a VLAN interface, you have to create a new service network:
-
In the Services tab, click network setup to display the current configuration of your network interfaces.

-
Add a directive to create a new VLAN interface.
The syntax is as follows:
service network eth<id>.<vlanid>service network eth<id>.<vlanid>In the example below, we create VLANs
100,200, and300on interfaceeth0:service network eth0.100 ip address 172.16.100.4/255.255.255.192 service network eth0.200 ip address 172.16.100.65/255.255.255.192 service network eth0.300 ip address 172.16.100.129/255.255.255.192service network eth0.100 ip address 172.16.100.4/255.255.255.192 service network eth0.200 ip address 172.16.100.65/255.255.255.192 service network eth0.300 ip address 172.16.100.129/255.255.255.192A physical network interface can support both its own IP configuration (untagged network) and one or more VLAN (tagged) interfaces. In this configuration, traffic with a VLAN tag matching a defined VLAN goes to the VLAN, and traffic without a VLAN tag goes to the untagged network.
The untagged network does not serve as a default destination for tagged traffic that does not match any of the defined VLANs. Tagged traffic that does not match a defined VLAN is dropped.
This configuration is not recommended because it relies on switches and routers to ensure untagged networks and tagged networks remain isolated. If an interface is intended to support multiple network schemes, a separate VLAN should be created for each scheme.
Below, we define two networks, one for untagged traffic and one for traffic tagged for VLAN 100. Traffic having any other tag is dropped. This configuration is not recommended.
service network eth0
  ip address 172.16.100.4/255.255.255.192

service network eth0.100
  ip address 172.16.100.65/255.255.255.192
service network eth0 ip address 172.16.100.4/255.255.255.192 service network eth0.100 ip address 172.16.100.65/255.255.255.192 -
Apply the configuration:
- If you just created the VLAN interface, click Restart on the network line.
- If you just updated an existing VLAN interface, click Reload.
You can manage IP configuration and VRRP settings in the same way as for a physical interface.
-
In the Setup tab, click Save under Local Configuration to persist your changes after a reboot.
Verify the VLAN interface Jump to heading
The VLAN interface should have been assigned to the physical interface, for example VLAN 100 on physical interface eth0. To check this, use the ip command to verify that the MAC addresses (the link/ether value) for the physical interface and its VLAN network are the same.
Below, we verify that the MAC addresses are the same on eth0 and eth0.100. Both show matching link/ether values of 08:00:27:8d:c0:4d.
nix
nix
outputtext
outputtext
Do you have any suggestions on how we can improve the content of this page?