Network
Default gateway
You can specify the default gateway that will allow your HAProxy ALOHA appliance to communicate with devices outside its subnet.
Caution
Specify only one default gateway unless directed otherwise: all network interfaces will use the default gateway you specify for any interface.
-
Before beginning, be sure to:
-
[VM appliance] Create a snapshot of your VM.
-
[Hardware appliance] Make sure you can connect to your appliance through the serial port.
If you specify an invalid IP address for the default gateway, you may not be able to log in to your appliance through SSH or display the web UI.
-
-
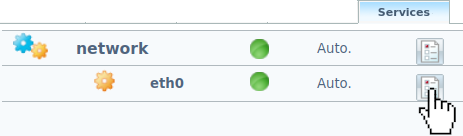
In the Services tab, click network instance setup next to a network interface.
-
Specify the default gateway through the
ip route defaultdirective.For example, to use the router whose IP address is
172.16.24.1as the default gateway:haproxyservice network eth0ip address 172.16.24.237/255.255.255.0ip route default 172.16.24.1haproxyservice network eth0ip address 172.16.24.237/255.255.255.0ip route default 172.16.24.1 -
Optional: If you configure multiple default gateways with
ip route default, then assign ametricvalue to each one to indicate their order of preference. Do this even if they are on different network devices (for exampleeth0andeth1). The default gateway with the lowestmetricvalue has the highest priority and will be chosen when routing to destinations outside the network. Ifmetricis not set, it defaults to0.haproxyservice network eth0ip address 172.16.24.237/255.255.255.0ip route default 172.16.24.1 metric 10haproxyservice network eth0ip address 172.16.24.237/255.255.255.0ip route default 172.16.24.1 metric 10 -
Reload the network interface or the whole network service.
-
To check the default gateway, go to the Tools tab and click Launch a terminal. Then run
netstat -r.nixnetstat -rnixnetstat -routputtextKernel IP routing tableDestination Gateway Genmask Flags MSS Window irtt Ifacedefault 172.16.24.1 0.0.0.0 UG 0 0 0 eth0172.16.24.0 * 255.255.255.0 U 0 0 0 eth0outputtextKernel IP routing tableDestination Gateway Genmask Flags MSS Window irtt Ifacedefault 172.16.24.1 0.0.0.0 UG 0 0 0 eth0172.16.24.0 * 255.255.255.0 U 0 0 0 eth0 -
In the Setup tab, click Save under Local Configuration to persist your changes after a reboot.
Do you have any suggestions on how we can improve the content of this page?