Installation
Install HAProxy Enterprise on Azure
In this section, you will learn how to install HAProxy Enterprise on Azure.
Launch HAProxy Enterprise Jump to heading
To launch HAProxy Enterprise directly from the Azure Marketplace:
-
From the Azure Marketplace, search for HAProxy Enterprise and choose one of the virtual machine images from the list that have the HAProxy Technologies logo. Options include an Ubuntu Server edition and a Red Hat Enterprise Linux edition.

-
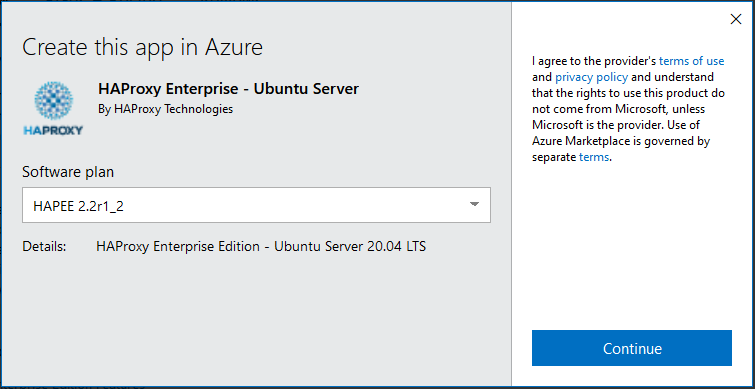
On the details page, click Get It Now and then select the software plan, which is the version of HAProxy Enterprise that you want to install.
-
On the next screen, click Create to launch the virtual machine. You can also click Start with a pre-set configuration to set up the VM with CPU and memory-optimized for a common workload.
-
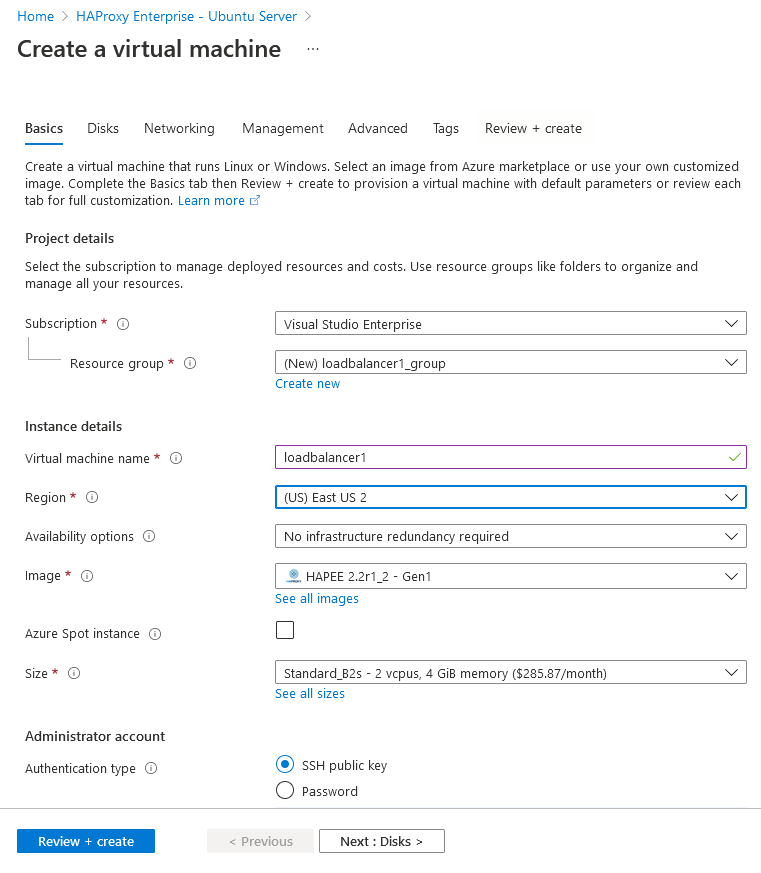
On the Create a virtual machine screen, fill in the fields for the resource group, virtual machine name, region, availability zone, image size, and Administrator account. We recommend setting up an SSH keypair here so that you can access your machine using SSH.
-
Continue through to the Networking screen. Choose whether you want to assign a public IP address to the load balancer.
- You can give the virtual machine a public IP, which makes it accessible from the Internet.
- Or, you can set the Public IP field to
Noneand select under Load balancing,Place this virtual machine behind an existing load-balancing solution, which allows you to place two or more HAProxy Enterprise servers behind an Azure Load Balancer. This allows you to run your HAProxy Enterprise load balancers in an active-active setup for high availability. You must create the Azure Load Balancer before you can complete this step.
-
Continue through the other tabs until you reach the Review + Create screen. Click Create to create the virtual machine.
Connect to the HAProxy Enterprise instance Jump to heading
During installation, you had the option to configure an SSH keypair that you can use to connect to the virtual machine.
-
If necessary, change the permissions on the private key file that you downloaded:
nixchmod 600 my-haproxy-enterprise_key.pemnixchmod 600 my-haproxy-enterprise_key.pem -
Copy the public IPv4 address for the instance from the Azure portal.
-
Connect to the HAProxy Enterprise instance through its public IP using SSH. For example:
nixssh -i my-haproxy-enterprise_key.pem azureuser@20.80.234.150nixssh -i my-haproxy-enterprise_key.pem azureuser@20.80.234.150If you set up an Azure Load Balancer in front of your instance, then you will need to go to the Load balancers screen and create an inbound NAT rule that maps a port for SSH (e.g. 222) on the Azure Load Balancer to port 22 on the HAProxy Enterprise instance.
Manage the HAProxy Enterprise service Jump to heading
The HAProxy Enterprise service runs at startup. You can manage the process with systemctl.
For example, use systemctl status to check that the service is running:
nix
nix
outputtext
outputtext
Access the Real-time Dashboard Jump to heading
-
Display the HAProxy Enterprise Real-time Dashboard credentials, which are stored in the file
/README.txt. For example:nixsudo cat /README.txtnixsudo cat /README.txtoutputtextusername: dashboardpassword: 091l/Bw2outputtextusername: dashboardpassword: 091l/Bw2 -
Connect to the dashboard through either HTTP (port 9022) or HTTPS (port 9023). The URLs are
http://<Public IPv4 address>:9022/andhttps://<Public IPv4 address>:9023/.
Connecting to
http://<Public IPv4 address>displays the load balancer’s statistics.
Do you have any suggestions on how we can improve the content of this page?